防止偷懶日記Day2
今天來重製一個之前用來學習CoreImage的Demo
延續上篇,這次一樣用程式碼來做畫面的刻畫
首先,畫面大概長這樣
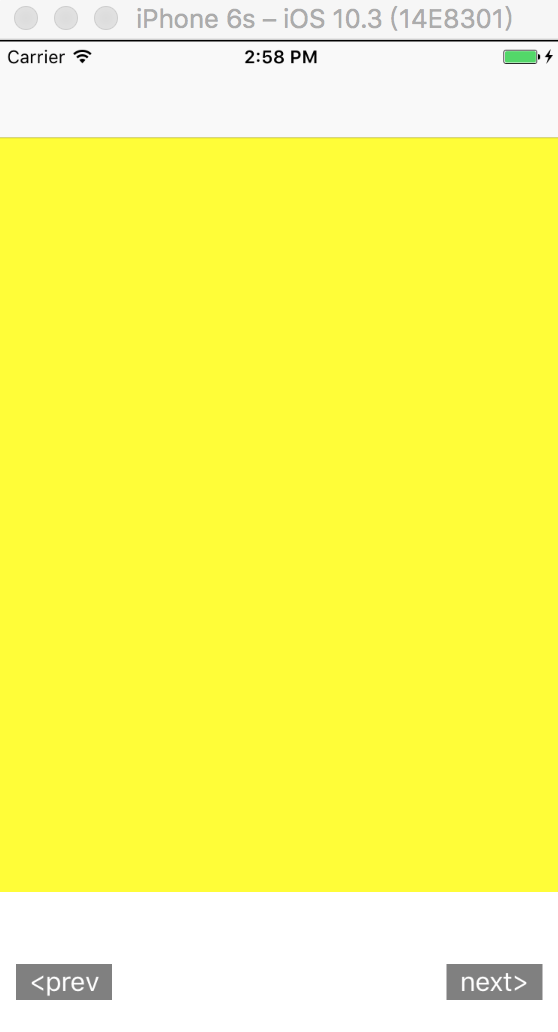
非常簡單的畫面,中央黃色區塊是一個imageView負責顯示各種輸入的畫面
左下跟右下兩個按鈕分別負責做出移動至上一張圖片跟下一張圖片的動作
OK! START!
首先是正中央的imageView,來到viewController
在class內部實做一個imageView
1
2
3
4
5
6
7
| let imageView: UIImageView = {
let image = UIImageView()
image.backgroundColor = .yellow
image.translatesAutoresizingMaskIntoConstraints = false
image.contentMode = .scaleAspectFit
return image
}()
|
這裡我們先指定背景顏色為黃色
然後第4行的值設定之所以為false
是為了讓之後的layout能順利運作,如果不做系統預設會是true
這樣系統會替元件做resizing的動作.
再來設定圖片內的顯示模式,這邊就可以看需要的模式去做調整
接下來就來實現兩個button吧
1
2
3
4
5
6
7
8
9
10
11
12
13
14
15
| let nextButton: UIButton = {
let button = UIButton()
button.backgroundColor = .gray
button.setTitle("next>", for: .normal)
button.translatesAutoresizingMaskIntoConstraints = false
return button
}()
let prevButton: UIButton = {
let button = UIButton()
button.backgroundColor = .gray
button.setTitle("<prev", for: .normal)
button.translatesAutoresizingMaskIntoConstraints = false
return button
}()
|
為了確實知道按鈕大小的範圍我們先設定灰色當按鈕的背景色
然後設定按鈕的標題
然後別忘了把translatesAutoresizingMaskIntoConstraints設為false
到這邊要新增的UI元件都實做了
再來就是把它們放到畫面中適當的位置了
第一步當然是把三個新物件放到view裡面
所以改寫一下viewDidLoad
1
2
3
4
5
6
7
8
| override func viewDidLoad() {
super.viewDidLoad()
view.backgroundColor = .white
view.addSubview(imageView)
view.addSubview(nextButton)
view.addSubview(prevButton)
setConstraint()
}
|
4到6行我們將剛做好的物件當作view的subView加入畫面中
第7行我們呼叫了一個新定義的函數
我準備在裡面設定上面三個物件的layout
詳細的設定就慢慢看下去吧
1
2
3
4
5
6
7
8
9
10
11
12
13
14
15
16
| func setConstraint() {
imageView.topAnchor.constraint(equalTo: view.topAnchor, constant: 64).isActive = true
imageView.bottomAnchor.constraint(equalTo: view.bottomAnchor, constant: -100).isActive = true
imageView.leftAnchor.constraint(equalTo: view.leftAnchor).isActive = true
imageView.rightAnchor.constraint(equalTo: view.rightAnchor).isActive = true
nextButton.topAnchor.constraint(equalTo: imageView.bottomAnchor, constant: 48).isActive = true
nextButton.rightAnchor.constraint(equalTo: view.rightAnchor, constant: -12).isActive = true
nextButton.heightAnchor.constraint(equalToConstant: 24).isActive = true
nextButton.widthAnchor.constraint(equalToConstant: 64).isActive = true
prevButton.topAnchor.constraint(equalTo: imageView.bottomAnchor, constant: 48).isActive = true
prevButton.leftAnchor.constraint(equalTo: view.leftAnchor, constant: 12).isActive = true
prevButton.heightAnchor.constraint(equalToConstant: 24).isActive = true
prevButton.widthAnchor.constraint(equalToConstant: 64).isActive = true
}
|
主要的概念是利用anchor constraint可以幫我們設定物件的上下左右跟寬高應該怎麼對齊
以imageView來說我希望上緣跟畫面上緣對齊,但要保留navigationbar的高度
因此定topAnchor跟整個view的topAnchor相等,並向下一個常數值64Points
備註:在iPhone6s下寬高分別為375 Points, 667 Points
而imageView的下緣我希望保留一段空間來放兩個按鈕
因此讓下緣對齊畫面下緣但向上移動100Points
最後imageView的左右都是跟畫面對齊,直接等於view的anchor即可
最尾端要加上isActive = true讓這個constraint實際作用
同理來設定兩個按鈕
右下方放置的NextButton上緣對齊imageView的下緣後下移48Points
右端則與畫面右邊對齊後往內縮12Points
然後設定寬跟高為64Points與24Points
左下的PrevButton上緣對齊方式與NextButton相同
左端則與畫面左邊對其並內縮12Points
寬高也與NextButton相同
OK,到這裡command + R按下去應該就可以看到我們所想像的畫面了.
下次再來實作按鈕的作用跟imageView換圖.